ZoomInfo offers you an extensive database filled with hundreds of millions of contacts in locations all over the world with all the information you need to reach out and start selling. But it’s more than that. You’ll also get tools that will help direct you to the right audience, real-time analytics into your prospects and what they’re interested in, conversation intelligence that enables you to optimize your scripts and pitches, and ways to segment your audience for better organization and interactions.
But with all this technology at your disposal, where should you start? In the world of sales enablement, you want to give your sales team not only the tools to excel but also the knowledge to use those tools best.
Our training guide will walk you and your sales professionals through all the ZoomInfo basics you need to know to use the platform efficiently and effectively.
Zoominfo Basics for Beginners
These ZoomInfo basics can kickstart your ZoomInfo usage, ensuring that your sales and marketing teams understand all the ins and outs of the platform before getting started.
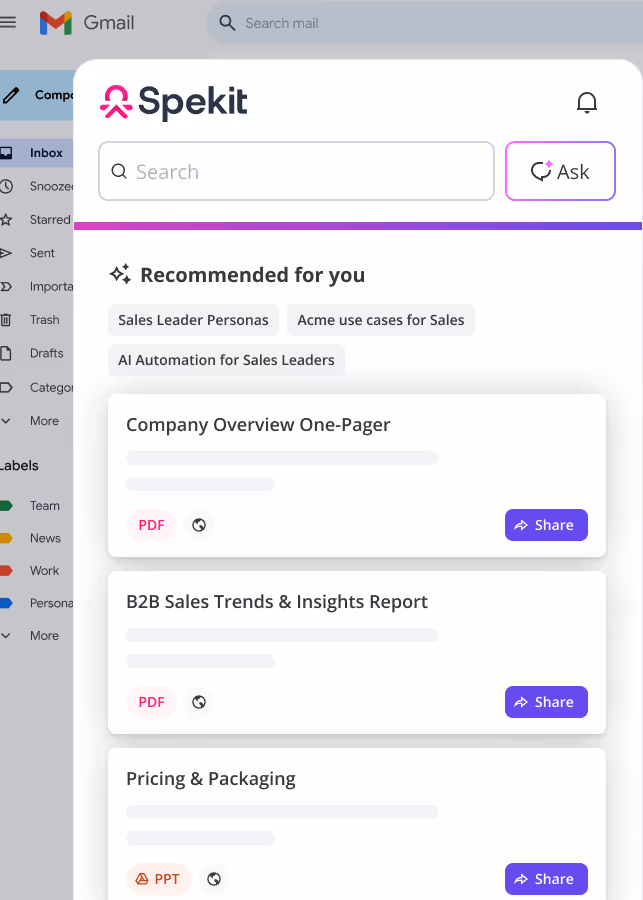
But keep in mind that the best way to train on any new platform is to learn while doing. With Spekit, all this training is embedded right into your team’s workflow.
While they’re working on ZoomInfo, Spekit can provide bite-sized bits of learning to make ZoomInfo training easier to understand and put into practice. When you learn in the flow of work, you’re learning while doing, which has been shown to be one of the most impactful ways to learn.
You’re not relying on massive manuals, which require your team to memorize information and then put it into practice later on. The result? Information overload, with your team having to waste time searching for that information later on because they never truly learned that info. Spekit gives your team easy-to-digest info and answers right when they need it most, helping them to implement their learning right then and there.
Spekit’s just-in-time learning platform offers:
- Spekit AI: Get AI-powered content recommendations, summarize lengthy content, optimize and personalize content, or write content with the push of a button that helps you better connect with prospects.
- SmartSend: Send your team the content they need to close deals, while also offering real-time analytics on the content’s adoption and engagement.
- Speks: These bite-sized bits of learning get embedded right into your sales rep’s workflow, helping them to learn while doing.
- Spotlights: Share new announcements and resources with your team, keeping everyone up-to-date and in the loop.
- Knowledge Checks: These short, in-app quizzes help your team test their skills and let you gain insight into any knowledge or skills gaps.
- Knowledge Base: Centralize your company’s knowledge to make it instantly accessible in any workflow.
- Analytics: Track activation and support content governance with analytics at the user, team, and content levels.
- Flows: Guide team members through tools and processes with these easy-to-create walkthroughs.
- Browser Extensions: Add your Spekit Knowledge Base to any web-based application.
With Spekit, you can leverage the power of AI to surface the answers, content and training sales reps need just in time, right in ZoomInfo.
Advanced Search in ZoomInfo
Running a Quick or Advanced Search in ZoomInfo means that you are able to build as broad or defined a set of results as you wish.
When running a search in ZoomInfo, there are a lot of options – so one must ask themselves what type of search am I looking to perform?
1. Am I looking for a list of companies based on company attributes such as number of employees, industry, or location? If yes, then you’d want to perform a Company List Search.
2. Am I looking for contacts at a company based on specific company and contact attributes? If yes, then you’d want to perform a search combining both Company and Contact List filters.
3. Am I looking for information on one specific contact? If yes, then you’d want to perform specific Contact Search.
4. Am I looking for information on one specific company? If yes, then you’d want to perform a specific Company Search.
The Advanced Search page is the lifeblood of the ZoomInfo application. This will be where you research, build lead lists, manage your own exclusion lists and much more. Click here for a more in-depth analysis of Advanced Search.
Advanced Search – Companies in ZoomInfo
Once you’ve decided that you want to perform a Company List Search – it’s as simple as choosing the filters you wish to apply to ZoomInfo’s extensive database of Companies.
1. Start your search off by typing in a Keyword in the search bar or clicking Advanced Search
2. There are numerous company filters you can apply to change the results of your ZoomInfo search.
3. As you add filters or keywords, they will appear in a box above the search results. You can clear single filters or keywords by hovering over them and clicking the “x” or hitting “Clear” to remove all of the current filters and keywords.
4. Review and refine the list of Search Results until it is exactly what you want.
5. Save the Search so that you easily reopen in the future.
6. Decide which Companies you want to Tag and/or Export.
NOTE: There are numerous ways to export the information including: Salesforce, Hubspot, Outreach, Salesloft, Zoho, Excel, or Email
Advanced Search – Contacts in ZoomInfo
Once you’ve decided that you want to perform a Contacts Search – it’s as simple as choosing the filters you wish to apply to ZoomInfo’s extensive database of Contacts.
1. Start your search off by typing in a Keyword in the search bar or clicking Advanced Search
2. There are numerous contacts filters you can apply to change the results of your ZoomInfo search.
3. As you add filters or keywords, they will appear in a box above the search results. You can clear single filters or keywords by hovering over them and clicking the “x” or hitting “Clear” to remove all of the current filters and keywords.
4. Review and refine the list of Search Results until it is exactly what you want. 5. Save the Search so that you easily reopen in the future.
5. Save the Search so that you easily reopen in the future.
6. Decide which Companies you want to Tag and/or Export.
NOTE: There are numerous ways to export the information including: Salesforce, Hubspot, Outreach, Salesloft, Zoho, Excel, or Email
Advanced Search – Both in ZoomInfo
The most common search in ZoomInfo will most likely be combining Company and Contact filters. When combining Company and Contact filters, it will only return results that fulfill all filters. So if a company fulfills your Company filters, but there are no Contacts that satisfy your Contact filters, then ZoomInfo will not give you any results for said Company.
1. Start your search off by typing in a Keyword in the search bar or clicking Advanced Search
2. There are numerous filters you can apply to change the results of your ZoomInfo search. Since you are performing a hybrid search, feel free to combine any number of the filters to get the perfect match of Contacts at the Companies that fulfill your criteria.
Pro-Tip: Scoops can be a great way to build Lists for hand-raisers. Click here to learn more about Scoops!
3. As you add filters or keywords, they will appear in a box above the search results. You can clear single filters or keywords by hovering over them and clicking the “x” or hitting “Clear” to remove all of the current filters and keywords.
4. Review and refine the list of Search Results until it is exactly what you want.
5. Save the Search so that you easily reopen in the future.
6. Deciding which Companies and/or Contacts you want to Tag or Export.
NOTE: There are numerous ways to export the information including: Salesforce, Hubspot, Outreach, Salesloft, Zoho, Excel, or Email
Scoops in ZoomInfo
Scoops are actionable intelligence leads that ZoomInfo sources through their surveys and in-house Research Team. ZoomInfo is able to identify internal projects and leadership moves to leverage so you can time your outreach effectively. These “triggering events” enable you to get a better understanding of a potential lead fit or need.
1. Start your search off by typing in a Keyword in the search bar or clicking Advanced Search
2. Click Scoops under the Sales Signals type of filter
3. There are lots of options for Scoops: Type, Topic, Department, or even searching by Keywords
Pro-Tip: Before saving or exporting a Scoop search, think about what key indicators make a prospect a good fit for your product. Is it when they begin to use a new Software? A surge of funding? Maybe a specific expansion of a department or hire? There are TONS of options, so play around and figure out which is best!
4. Review and refine the list of Search Results until it is exactly what you want.
Pro-Tip: You can combine Scoops with the other Company and Contact filters
5. Save the Search so that you easily reopen in the future.
6. Decide which Companies you want to Tag and/or Export.
NOTE: There are numerous ways to export the information including: Salesforce, Hubspot, Outreach, Salesloft, Zoho, Excel, or Email
Save & Subscribe in ZoomInfo
Save and Subscribe protects you from having to rebuild your lists when returning to the platform. As you continue to use ZoomInfo, you will accumulate more and more searches, some of which you will want to revisit, reuse, or modify for a different search. It’s best practice to Save and Subscribe to that Search, not only will this save you time in the future, but it will allow you to set up notification settings for your searches.
1. Create the Advanced Search you wish to Save & Subscribe
2. Click Save & Subscribe
3. Choose Save as a New Search if you want a brand new Saved Search or choose Replace Existing Search if you wish to replace an old Search that is no longer needed. Name your Search & add a description to keep your Searches organized
Note: When saving a search, it will automatically save the Search Filters.
Pro-Tip: Make sure you really want to replace a search – having a history of searches can be useful. Even if you think a search is obsolete, it’s best practice not to replace searches unless they haven’t been used for a certain period of time (90 days most common).
4. Choose whether you want to get Email notifications (“Alerts”) for specific activities and the frequency of those Email Alerts
- The activities you can set Alerts for: Contacts added to your Saved Search, Companies added to your Saved Search, and/or Scoops added to a Contact or Company in your Saved Search.
- The frequency you can set Alerts: Daily, Weekly, or None
Pro-Tip: Alerts can be helpful with specific sales motions. If doing Account Based Selling, it can be very beneficial to get Weekly updates on the Accounts (Companies) you are responsible for. However, the more Companies or Contacts you are responsible for/that are in your Saved Search, the less helpful the alerts become. REMEMBER, if you find yourself ignoring or no longer getting value out of your Saved Search alerts, it’s time to revisit your Saved Searches and their Alerts.
5. Click Save – those searches are now available in your Saved Searches
Pro-Tip: There are no limits to the amount of Saved Searches you can have. Take advantage of the ability to be the first to know when Contacts, Companies, or Scoops are added to the platform.
Accessing Saved Searches in ZoomInfo
Accessing your ZoomInfo Saved Searches can be accessed via multiple click paths.
1. You can access your Saved Searches from the User Dashboard by clicking the specific Saved Search from the preview if it’s visible or by clicking All Saved Searches
NOTE: When you open a Saved Search directly from the Dashboard, it will take you to the Advanced Search page with that Saved Search
2. You can also access your Saved Searches directly from the Advanced Search page by clicking Open Search and then Open Saved Searches
NOTE: When you Open Saved Searches from the Advanced Search page, it will take you to the Saved Searches page
3. You can manage all your Saved Searches from the Saved Searches page (Accessed via Dashboard by clicking All Saved Searches (1) or by Clicking Open Search and then Open Saved Searches from Advanced Search(2))
Pro-Tip: Don’t be afraid to Save Searches! But remember, if you do not curate your saved lists then they could become unruly and unorganized. Best practice is to revisit your Saved Searches once every 90 days and remove any that are no longer needed.
Saved Searches in ZoomInfo
Now that you know how to access your Saved Searches – managing them from the Saved Searches page is easy. It’s important to stay on top of all of your Saved Searches, along with the Email Alert settings you have for them. The more time you spend on managing your Saved Lists, the more time you will save when looking and actually using them!
Pro-Tip: Don’t be afraid to Save Searches! But remember, if you do not curate your saved searches then they could become unruly and unorganized. Best practice is to revisit your Saved Searches once every 90 days and remove any that are no longer needed.
Lists in ZoomInfo
Lists allows users to manage all data they’ve uploaded, processed, or redeemed from ZoomInfo sources. These include files uploaded as ListMatch, Enhance, Neverbounce, Preview, or Suppression. Lists are specific to the user’s account and not shared across the organization.
Pro-Tip: Using Lists can be an enormous time-saver when searching for Contacts or looking to filter a previously uploaded List for Company Attributes. For example, if you upload a list of target accounts and then search for IT Directors at those Companies, great. But you could also reopen that same saved List and, this time, look for additional contacts in HR or Operations so that you are engaging multiple stakeholders within organizations.
1. Click the Lists tab on the top of ZoomInfo
2. The Lists navigation bar will take you to different views of your lists:
- All Lists contains all your lists
- Uploaded contains all lists you’ve uploaded into ZoomInfo
- Processed contains all the lists that have finished processing but haven’t been redeemed
- CRM Bulk Exports contains lists containing >= 25 records you’ve exported straight into a CRM
- My Tags contains all your tagged Contact or Company Lists
- My Records contains all the previous Contact or Company records you’ve previously redeemed
3. The most common actions you will take from the Lists page are going to be filtering by List Type (A), Actioning on Lists (B), or Uploading a new List (C) to ZoomInfo
Pro-Tip: Never delete a redeemed list – you never know when you might need to re-download a List, and if you delete a Redeemed List, you might need to spend credits on the same Contacts or Companies in the future!
4. Along with the top 3 most common actions mentioned above, you can see various information about all of your Lists: Date, List Name, Description, # of Records, List Type, & Status of the Lists.
Upload Lists in ZoomInfo
Uploading Lists into ZoomInfo has many benefits – most of which can be seen in the screenshot below.
1. Click Upload Lists in the top right of the Lists page
2. Choose the kind of list you are uploading: ListMatch, Enhance, NeverBounce, or Preview File
NOTE: NeverBounce is an additional feature that is extra
3. Choose how you would like to upload the list: Upload directly from a CSV file, choose a list from My Lists already in ZoomInfo, or directly by typing into a Text Input
4. Name your list, give it a description, and add a Tag
5. Decide how to map your fields from your import to ZoomInfo’s fields
NOTE: Fields are listed in priority order according to ZoomInfo to provide you with the best match.
6. Click Submit when the list is ready to be uploaded
Enhance in ZoomInfo
Enhance allows you to fill in the data blanks with important demographic and firmographic information. Whether filling out a lead list missing crucial data, removing duplicates for data hygiene, or filling in the gaps for a campaign, use Enhance to confirm that you are using the most accurate data possible.
Pro-Tip: Enhance is a great tool when dealing with an incomplete array of data, as it quickly references the information in your spreadsheet against our millions of Contact and Company records, saving you the time of looking them up one by one, and it uses credits only for those records we are able to update.
1. Click the Lists tab at the top of the navigation bar
2. Click Upload Lists
3. Inside the pop-up, choose either Companies or Contacts, and then select Enhance and click Next
4. Choose to Upload CSV, choose a list from My Lists, or use Text Input. Click Next.
Pro-Tip: CSV files do not need to be specially formatted–ZoomInfo will read the file and map data points, and you will have the chance to verify before submitting
5. Customize your list’s name
6. Double-check that your data is reflected on the Mapping screen
7. Click Submit and then click Finish
8. Your file will be processed and accessible under the Processed tab when ready
9. Once your list is ready, the ellipsis next to it gives you options to Redeem, Rename, or Open in Search.
Pro-Tip: Open in Search is the best option if you are looking to filter and refine the list – such as if you uploaded a list of Companies and now you need Contacts.
10. Redeem your list once you are ready to export the Contact or Company data.
ListMatch in ZoomInfo
ListMatch provides you the ability to upload a list of companies or contacts with unique identifiers such as company names, websites, or contact emails and match those records against companies and contacts in ZoomInfo. ListMatch can help you quickly get a lead or company list into ZoomInfo and fill in any missing data that ZoomInfo has that your original file did not. Along with the additional information, you can tag and filter in ZoomInfo to better manage your lists.
1. Click Upload Lists in the top right of the Lists page
2. Click Upload Lists.
3. Click ListMatch & choose whether you are matching a list of Contacts or Companies.
4. Click Next, then choose to Upload CSV, choose a list from My Lists, or use Text Input. Click Next.
Pro-Tip: CSV files do not need to be specially formatted–ZoomInfo will read the file and map data points, and you will have the chance to verify before Submitting
5. Name your file and click Next.
6. Add a Description and/or Tag and click Next
7. Verify that the mapping ZoomInfo auto-filled is correct and click Submit.
NOTE: If a field is mapped, there will be a green checkmark and it will say “Mapped” under Map Status. If you see “Unmapped”, double check to make sure those aren’t fields you need to map using the drop-down and selecting your files field to map to ZoomInfo’s fields.
8. Your List will be visible under All Lists and Uploaded and, when ready, will be accessible from the main Lists page or Processed tab.
9. Once your list is ready, the ellipsis next to it gives you options to Redeem, Rename, or Open in Search.
Pro-Tip: Open in Search is the best option if you are looking to filter and refine the list – such as if you uploaded a list of Companies and now you need Contacts.
10. Redeem your list once you are ready to export the Contact or Company data.
Neverbounce in ZoomInfo
NeverBounce is a leading provider of list verification available directly in ZoomInfo. NeverBounce will clean your selected emails, flagging ones that are safe or unsafe for your campaigns.
- Click on the Lists tab in ZoomInfo.
- Click Upload Lists in the upper right corner.
- Select Contacts and NeverBounce as your options and click Next
- Click Upload CSV and select your file of Contacts and their email addresses.
- Name your file, and click Submit.
- Click Finish.
- Your verified list will be available under Processed lists when ready.
- Use the ellipsis in the last column to choose to Redeem, View, Rename, or Delete.
- Click View Results to see a graphic display of your verified list.
- Click Redeem to export your verified email list; a pop-up with credit consumption will be displayed before you click OK.
Alerts in ZoomInfo
Alerts in ZoomInfo will notify you when selected Companies have new Company News, added or dropped Technologies, and/or even when they receive specific rounds of Funding.
Pro-Tip: By utilizing Alerts, you can respond to your target Companies making specific and important buyer changes. This will allow you to not only strike while the iron is hot, but will help your overall campaign by delivering hyper-specific and relevant content to the target Contacts.
1. Click the Alerts tab in the top navigation bar
2. Select which type of alert you would like to be notified about: News, Technologies, or Funding
NOTE: Click into Companies, Technology, or Funding Alert to learn how to set these Alert types up.
4. You will now receive notifications in your inbox when Alerts of interest are uncovered in the platform
ZoomInfo can get the ball rolling on finding you the right prospects to connect with, while Spekit can help you make stronger connections. Spekit can function as a content management system, but it does much more than give you a place to store content. Spekit makes sure that you’re using each piece of content in the most effective way.
Spekit offers AI-content recommendations based on your previous interactions with a prospect and the prospect’s behavior and intent data. The best part is that you don’t need to leave ZoomInfo to get all of the benefits of using Spekit. These recommendations come to wherever your sales professionals are working, ensuring a boost in productivity and efficiency.
With Spekit, you’ll build better relationships and have more productive conversations and communications, ensuring that you’re personalizing interactions and making your prospects feel heard and understood.
Company Alerts in ZoomInfo
1. Search for a specific company via Advanced Search
2. Select the company you wish to get Company Alerts for
3. Once in the Company page, click the 3 dots in the top right corner
4. Click “Subscribe to Newsfeed”
5. Click “Subscribe” to finalize adding this company to your My Alerts
Pro-Tip: You can also subscribe to Email Alerts for this specific company as well by clicking Email Alerts, clicking the “Get Email Alerts for [COMPANY]” and then clicking Subscribe
6. Navigate to My Alerts to see which Companies you are subscribed to Alerts for
Funding Alerts in ZoomInfo
1. Click Alerts in the top navigation bar
2. Click Funding from the left Alert Options
3. Click New Funding Alert
4. Select the specific Funding criteria for this Alert
5. Once you’ve chosen your Funding criteria, you can track this funding without filters by clicking Track, or you can Add Filters to further refine your alert to be more relevant
Pro-Tip: Add Filters! Very rarely will you want to simply track all companies using these funding criteria without further filtering your results for better segmentation. Even if you DO want to track all companies, regardless of company criteria, you can create multiple Alerts to better segment in the front end instead of waiting until AFTER the alert to further refine your company searches.
6. As you add Filters, they will appear under the Company Filters portion of your screen, allowing you to keep track of which filters for which Funding criteria you are adding
NOTE: You have ALL the filters available in ZoomInfo’s Advanced Company Search
7. Click Track once you’ve added all the company filters you want for this specific Funding Alert
8. Navigate to My Alerts to see which Funding criteria you are subscribed to Alerts for
Technology Alerts in ZoomInfo
1. Click Alerts in the top navigation bar
2. Click Technologies from the left Alert options
3. Click New Technologies
Pro-Tip: If you don’t see a technology from the list when clicking “New Technologies”, feel free to request that technology be added by ZoomInfo by clicking “Request a Technology”
4. Type the desired technology into the “Search Technologies” box; as you type, a drop-down will appear with the relevant searched Technologies
OR you can click “Explore” and go through a more guided search experience based on the chosen Technologies Category, Vendor, and then specific Product.
5. Select the specific product from the search dropdown OR click “Add Technologies” if using the Explore search
6. Once you’ve chosen your technology, you can track this technology without filters by clicking Track, or you can Add Filters to further refine your alert to be more relevant
Pro-Tip: Add Filters! Very rarely will you want to simply track all companies using these technologies without further filtering your results for better segmentation. Even if you DO want to track all companies, regardless of company criteria, you can create multiple Alerts to better segment in the front end instead of waiting until AFTER the alert to further refine your company searches.
7. As you add Filters, they will appear under the Company Filters portion of your screen, allowing you to keep track of which filters for which technology you are adding
NOTE: You have ALL the filters available in ZoomInfo’s Advanced Company Search
8. Click Track once you’ve added all the company filters you want for this specific technology
9. Navigate to My Alerts to see which Technologies you are subscribed to Alerts for
Tags in ZoomInfo
Tags are a way of organizing your ZoomInfo. They are a useful way to take notes between the various objects in ZoomInfo, including but not limited to: Contacts, Companies, Lists, & Scoops.
Pro-Tip: You can use tags to exclude specific companies or contacts from appearing on Advanced Searches or lists by utilizing Exclusions.
You can Manage your Tags from the Lists page, where you can delete or edit them at any time.
1. Start your search off by typing in a Keyword in the search bar or clicking Advanced Search
2. Choose the Contacts or Companies you wish to tag
3. Click Tag Contacts or Tag Companies
4. Choose an already existing tag by clicking the box next to that Tag OR click Create New Tag to make a new tag
5. If Creating New Tag, name the tag and then click Add
6. All your tags will be in the Search Criteria on the left under Tags
7. You can Manage your Tags from the Lists page, where you can delete or edit them at any time.
Account Settings in ZoomInfo
Settings is where you can access and manage your individual user information and access, Integrations approved by your admin, and Customization options to your ZoomInfo.
1. Click your initials in the top right corner of the navigation bar in ZoomInfo
2. Click Settings
Depending on whether you are an admin or not, as well as what package of ZoomInfo you are subscribed to, will determine what options you see in your Settings. However, every user will have access to My Account, which will provide you with: basic account information and your credit usage and availability for both monthly and/or bulk credits.
Integrations in ZoomInfo
Settings is where you can access and manage your individual user information and access, Integrations approved by your admin, and Customization options to your ZoomInfo.
The Integrations tab will allow you to connect to integrated tools that your Admin has enabled in ZoomInfo. If you see an application listed under this tab with the ability to Connect – your admin has enabled that integration.
1. Click your initials on the top right of ZoomInfo
2. Click Settings
3. Click Integrations
4. Click Connect next to the desired integration
5. Enter relevant login information
6. Moving forward, the Connected integration will now appear as an Export option in ZoomInfo
Below is a list of available ZoomInfo integrations:
- Bullhorn
- Eloqua
- Engage
- Hubspot
- Marketo
- Microsoft Dynamics
- Outreach
- Pardot
- Pipedrive
- Salesloft
- Salesforce
- SugarCRM
- Zoho
Customization in ZoomInfo
Settings is where you can access and manage your individual user information and access, Integrations approved by your admin, and Customization options to your ZoomInfo.
Advanced and Elite ZoomInfo customers will see a Customization tab. These settings allow you to customize which Contact and Company Tabs are most relevant, which Search Results columns you want to include in your view, and what details you want to include in any CSV exports.
1. Click Customization tab from within your Settings
2. Choose what you would like to customize from the options:
- Profile Tabs: This will change what tabs you have visible when looking at a specific contact or company
- Search Result Columns: This will change what columns you see when performing searches for contacts or companies
- Export to CSV: This will change what columns you see when exporting from ZoomInfo to a CSV
Pro-Tip: Customize if you are able to! It’s easy and curates your ZoomInfo experience to you and your workflow. This can save time and decrease your need to search for only relevant fields through the not-so-relevant ones. Also, it’s easy to reset any of these back to the default by clicking “Back to default” from within each customization – low risk, high reward!
Homepage in ZoomInfo
The ZoomInfo homepage is where you will most likely start your ZoomInfo experience every time you access the tool. It provides an easy way to manage your Integrations, Recent Saved Searches, Recently Viewed Contacts & Companies, Technologies Signals, & My Feed.
Pro-Tip: If nothing else, customize your Technology Signals and My Feed – both of these will provide tons of value by giving you the most relevant & actionable data points. ZoomInfo has over 19 Million Companies and 130 Million contacts, so take advantage of the features that help sift through all of that data!
My Feed in ZoomInfo
My Feed is located on your homepage and will show you featured updates on companies based on your preferences. A few examples of these updates are technology changes, hiring, funding, and general news, but there are many more. Managing and curating your feed is easy but impactful. It allows you to stay up to date on your target companies, in turn increasing your ability to leverage the vast data of ZoomInfo.
Pro-Tip: Along with customizing your feed with Manage my Feed, you can also filter your feed in real-time by: Scoops, News, Funding, & Technologies.
1. Click Manage My Feed near the top of your ZoomInfo homepage
2. From here, you will have 3 types of feed updates:
- General Settings: Manage the types of Industries, Locations, and/or Company Sizes you’d like to see on your feed
- Intent Topics: Very similar to Scoops – they allow you to get insider knowledge into people and companies with what they are researching. Some examples of the thousands of Intent Topics are: End-to-End Encryption, Hybrid Working, Marketing Solutions,
NOTE: This is an add-on feature, which means it costs extra. Talk to your ZoomInfo admin about unlocking this powerful feature.
- Technologies: Your feed will notify you of companies as they add or drop technologies.
Pro-Tip: There are thousands of options to choose from here, and in today’s world, the addition of technologies can be a great door opener for many other solutions. Consider what technologies are buyer signals for you.
3. Choose the frequency at which you would like to receive Email Notifications based on My Feed: Daily, Weekly, or None.
4. Click Save
Contact Profile in ZoomInfo
The Contact Profile in ZoomInfo will provide contact information and company information on the specific contact you are viewing.
A. (Red): This is the basic contact information that ZoomInfo has for this contact: Name, Title, Contact Details, Job Start Date.
B. (Blue): This is the Employment History and Web References for the contact.
Pro-Tip: This information can be helpful for standing out to a high-value prospect! Look at their Web References and see if there are any articles or events that you could mention in your outreach to this contact.
C. (Pink): This is the possible actions you will most likely take for this contact: Whether that’s exporting now or tagging this contact.
Pro-Tip: Exporting contacts one by one can be time-consuming. Tag all the prospects you want to group together in a specific campaign and then export them in bulk based on that tag. Not only will this save time, but then you have organized like-contacts with the tag – 2 birds with 1 stone!
D. (Green): This is the basic company information for the contact’s current company.
E. (Black): These are the Company tabs that go into more detail on the Companies Overview, Org Chat, Employees, Technologies and Attributes, Scoops, News, and more. Click here for a more in-depth analysis of the Company Profile.
Pro-Tip: Much like how Employment History and Web References can be helpful for standing out to contacts, so can using specific company attributes. Use Scoops and Org charts to show the contact you’ve done your research on them and their company.
Company Profile in ZoomInfo
ZoomInfo Company and Contact Profile Pages contain numerous data points that will help you get a deeper understanding of a company or contact – ensuring you are saying the right thing at the right time. Know the answer to potential questions before they’re asked; leverage the information on this page to position your company as the ideal solution to the unique challenges being faced by your prospects.
Advanced Search Cont.
Advanced Search is where you will be spending most of your time conducting searches by applying a vast array of filters to find the perfect companies and prospects for your workflow.
Here are a few examples of some Use Cases. However, this only scratches the surface of ZoomInfo Advanced Search’s potential:
- Build targeted campaign lists for both companies and contacts
- Vet potential companies or contacts by location or technology stack
- Leverage multiple data points such as Revenue and Employee Headcount to identify best-fit companies and contacts
- Determine the perfect Ideal Customer Profile by company size based on Revenue and/or Employee Headcount
- Find key decision-makers based on Management Level, Title, or Job Function
Specific Contact Search in ZoomInfo
ZoomInfo is a powerful tool when compiling contact lists of companies or contacts based on different filters and criteria, such as company industry, company size, contact position, or contact location. However, ZoomInfo is also useful when trying to locate information, whether that be for research or contact information (email & phone).
1. Start your search off by typing in the individual’s name into the search bar at the top
2. ZoomInfo will load the top results; click the specific Contact you are looking for
3. You now have access to a wide array of different information on this contact. Ranging from basic contact information like email and phone number, to more advanced education, employment history, and also in-depth company information. Click here for a more in-depth analysis of the Contact Profile.
Specific Company Search in ZoomInfo
Definition
ZoomInfo is a powerful tool when compiling contact lists of companies or contacts based on different filters and criteria, such as company industry, company size, contact position, or contact location. However, ZoomInfo is also useful when trying to locate company information, whether that be for research or searching for the right contact to reach in that company.
1. Start your search off by typing in the company’s name into the search bar at the top
2. ZoomInfo will load the top results; click the specific Company you are looking for
3. You now have access to a wide array of different company information. Ranging from basic information like company size and industry, to more advanced Scoops, Technologies & Attributes. Click here for a more in-depth analysis of the Company Profile.
WebSights in ZoomInfo
WebSights allows you to see what companies have visited your website. This allows you to reach out to prospects at a time when you know they are researching solutions directly related to your company.
NOTE: If you need help getting WebSights set up, check out ZoomInfo’s installation guide.
1. Click the WebSights tab on the top of ZoomInfo
2. From the WebSights default List view you will have a list of contacts from companies that have visited your website.
3. Filter the list of companies by the below:
Time
- When they visited your website
Domain Name
- You can have multiple domains set up on WebSights
Company Name
- You can filter your list to search for a specific company that has visited your website
Webpage(s) URL
- You can filter by those who have visited a specific Webpage URL on one of your domains set up for WebSights
Unique Visits
- You can filter based on a minimum or maximum amount of Unique Visits by a company
- A unique visit is one that is considered a new user viewing your website
Page Views
- You can filter based on a minimum or maximum amount of Page Views by a company
4. Once you’ve filtered your WebSights list view by the above filters, you can Tag or Open the selected companies from your list as an Advanced Company Search.
Along with the List View, WebSights has a lot of valuable data in the Dashboard view. Check out information on that here.
WebSights Dashboard in ZoomInfo
WebSights allows you to see what companies have visited your website. Along with the WebSights List view, which allows you to build a Company List based on your website visitors, there is also the WebSights Dashboard view. This view allows you to see key insights into the type of visitors your website is getting.
1. Click the WebSights tab on the top of ZoomInfo
2. Click Dashboard on the top right of the search results area
3. Filter the Dashboard view by the below:
NOTE: These are the same filters available for WebSights in the List view
Time
- When they visited your website
Domain Name
- You can have multiple domains set up on WebSights
Company Name
- You can filter your list to search for a specific company that has visited your website
Webpage(s) URL
- You can filter by those who have visited a specific Webpage URL on one of your domains set up for WebSights
Unique Visits
- You can filter based on a minimum or maximum amount of Unique Visits by a company
- A unique visit is one that is considered a new user viewing your website
Page Views
- You can filter based on a minimum or maximum amount of Page Views by a company
4. Based on your filters, you will have various reporting tiles including:
- Key Highlights
- These include the number of Unique Companies, Unique Visits, Page Views, Avg. Pages Per Visit, and Identified Traffic
- Unique Visits graph over your filter time interval
- Most Visited Companies including the number of visits
- Most Visited Pages on your website including the number of visits
- Company Insights of the visitors based on:
- Revenue
- Employee Count
- Industries
- Location
Pro-Tip: Unlike the List view, where your goal is usually to build a list of the companies visiting your website, the Dashboard view is more about gathering demographic information to better understand your Ideal Customer Profile (ICP). It can also be helpful to educate yourself on what types of clients are seeking out your company.
Intent in ZoomInfo
ZoomInfo’s Intent data identifies companies that are doing an above-average amount of research on specific topics that you can choose to monitor. This allows you to have insider knowledge into the types of research they are doing, which can be an indicator of when to time your Outreach. They’re contact tracking online traffic of the following types of data on third-party sites:
- Product reviews
- Product comparisons
- Message boards
- Blogs
- Case studies
- General articles/news
1. Navigate to the Intent page from the top of your ZoomInfo
2. From here your Intent topics that you’ve chosen to subscribe to on your Feed page should autofill.
NOTE: You can add or remove the Intent topics by clicking the filters that auto-populate from your Feed. These will change them for this search but not for your Feed.
3. Select whether you want your search to include Any or All of your selected Intent Topics
4. Apply any Company Filters
NOTE: These filters are the same as the Company filters in the Advanced Search
5. Adjust how frequently employees are searching for these topics by increasing the Signal Score – the higher the number, the more searches on that topic have been performed by an employee at that company.
NOTE: Signal score is increased if the employee(s) visit more web pages pertaining to the topic, download white papers, attend webinars, etc.
6. Adjust how many employees are searching for these topics by increasing the Audience Strength: the higher the number, the higher the percentage of employees that are searching those topics.
Pro-Tip: It can sound a bit confusing, but Signal Score is the amount of research one employee is doing, while Audience Strength is how many employees at that company are performing research related to your topics.
7. Click Open in Search and select whether you want a Contact or Company Search. This will allow you to Tag and Export the company or contacts related to your Intent search.
Technologies Signals in ZoomInfo
Technologies Signals are a way to see what technologies are being added and dropped. Since technology has become so integral for everything, these company changes can be leveraged. By using these Technologies Signals, you can reach out to a company or contact at the most opportune time, and ZoomInfo has thousands of technologies available.
1. From your ZoomInfo Homepage, click the gear in the Technologies Signals box on the right.
2. Choose whether you want to use:
- Simple Search: A keyword-type search that will pull up suggestions as you type them OR
- Advanced Search: A guided search where you choose the technologies Category, Vendor, and Product from a list
Pro-Tip: You can combine both Simple Searches and Advanced Searches! However, there is a limit to 50 technologies that you can track with Technologies Signals at any given time.
3. Click Finish Editing once you’ve finished
4. Once you’ve added technologies, you will see numbers for Added and Dropped for the past 7 days. Click into either of these numbers to take you to the Advanced Search page in ZoomInfo to begin researching, tagging, or even exporting into a Lead list.
5. Click Search by Technologies if you want to perform an Advanced Search for ALL of your chosen technologies
NOTE: You can search by dropped or added technologies
Pro-Tip: Since Technologies Signals only show for the past 7 days, it’s smart to tag companies with tags if you can’t get to them in the next 7 days or if 7 days is too soon for your specific workflow. Tag it with the technology dropped, and then that information won’t go away even if the 7 days pass!
Submitting a Research Request in ZoomInfo
If you cannot find a specific Contact or Company, you can submit a Research Request from ZoomInfo. One thing to note is that you must purchase specific Research Credits in order to do this.
1. Type the Contacts Name into the Quick Bar at the top.
2. If they are not available, no results will show, but the option to “Submit a Research Request” will appear; click it
3. A type form will pop up; fill out all the information you can
NOTE: First Name, Last Name, Job Title, and Company Name are required.
4. Once the request has been submitted, ZoomInfo’s Research team will get to work trying to add the Contact into the database. Currently, users who submit requests are not notified of progress or completion.
ZoomInfo Webinars
ZoomInfo offers users ZoomInfo University, which provides customers with training on how to use and optimize their use of ZoomInfo. A part of ZoomInfo University is Live Webinars.
These webinars go over ZoomInfo’s features and how to use them, but they also dive into tips and tricks on the best way to segment and target your audience, integrate ZoomInfo into your existing tech stack, and automate pieces of your sales process to boost your team’s productivity.
These webinars can be helpful when looking to do a deep dive into a specific feature or process on ZoomInfo, but keep in mind that studies show that people learn best when they’re given multiple ways to learn–not just webinars.
For example, Spekit offers short quizzes so reps can test their knowledge, as well as sends your sales reps the answers to their training questions right in ZoomInfo. With Spekit’s helpful insights to guide them, they’ll learn while they’re working, rather than trying to memorize content from a webinar to put into action later.
ZoomInfo Integrations
ZoomInfo partners with more than 70 tools, helping you to keep your tech stack connected. These tools include customer relationship management platforms (CRMs), email platforms, sale enablement software, data warehouses, and more.
If you’re looking to integrate ZoomInfo into a current tool in your tech stack, ZoomInfo has helpful guides on how to make these integrations happen. In many cases, a third-party integration can be completed through the Admin Portal.
However, in some cases, you may need the support of a ZoomInfo engineer. If you don’t see the tool you want to integrate with ZoomInfo listed in their implementation guides, contact ZoomInfo to schedule a call with a dedicated integration engineer.
During the call, your ZoomInfo admin user must be present and have access to the Admin Portal. Your admin will be guided through the integration and installation steps and will also likely be asked to complete a test record to ensure the integration is working properly before the call ends.
ZoomInfo FAQs
Let’s learn a little bit more about ZoomInfo.
What is ZoomInfo?
ZoomInfo is a B2B sales engagement platform. In addition to offering an extensive database filled with hundreds of millions of profiles of contact information, ZoomInfo also provides you with tools to ensure you’re connecting with the right people.
ZoomInfo offers tools to search for and segment your audience, analytics that tell you about your audience and help you predict your next customer, and notifications that keep you up to date on what’s happening in your prospect’s world to ensure you’re connecting with them at the right time.
For more insights into what ZoomInfo is and how to use it, check out Spekit’s ZoomInfo FAQ template and additional ZoomInfo templates.
How does ZoomInfo obtain its data?
It’s not uncommon for someone to ask, “Is ZoomInfo legal?” The answer is that ZoomInfo is indeed legal and makes efforts to comply with the California Consumer Privacy Act and the General Data Protection Regulation. ZoomInfo only acquires data that are publicly accessible. It does not collect personal, sensitive data, such as health information, browser history, or financial history.
ZoomInfo collects and vets its data from various sources, including:
- Contributors: ZoomInfo’s community of contributors allows ZoomInfo’s machine learning to track the email signature lines of sent and received emails in their inbox. Through this process, ZoomInfo verifies 20 million email signatures a month through this process.
- Machine Learning: ZoomInfo’s machine learning is constantly reading corporate websites, press releases, news articles, job postings, Security and Exchange Commission filings, and other online sources to paint a picture of a company and its employees.
- Human Research: An in-house human research and development team’s main goal is to optimize ZoomInfo’s data collection process. They unearth information about contacts and companies themselves, as well as ensure their automated processes are working properly.
Third-Party Expert Partners: ZoomInfo has a team of third-party sources that aggregate data from public companies, merger and acquisition history, government data sources, and social media feeds.
What types of information can I find on ZoomInfo?
When it comes to an individual profile, users can expect ZoomInfo to have information including:
- Name, company, education, and experience
- Phone number, email address, and social handles
- Office address (not personal address)
- Job role and responsibilities
ZoomInfo also contains additional data like:
- Behavior and intent data
- Industry and market trends
- Actionable insights to optimize your selling
Is there a free version of ZoomInfo available?
ZoomInfo offers ZoomInfo Lite, which provides free, ongoing access to ZoomInfo’s profiles. However, to use this community edition, you must agree to share your business contacts with ZoomInfo. Though you can access the entire database, you only get a certain number of profiles’ contact information per month.
ZoomInfo Lite works with Google Apps for Business and Microsoft Outlook. Anyone using these products is eligible for ZoomInfo Lite, provided that they are not current or past subscribers to a premium version of ZoomInfo. Additionally, only three employees of a single company can access the ZoomInfo database with ZoomInfo Lite.
How can I ensure my personal information is protected on ZoomInfo?
First, it’s important to know that ZoomInfo doesn’t collect personal information. Sensitive information, such as where you live, who you live with, your health and financial history, and browser history, are never collected by ZoomInfo and are not accessible to ZoomInfo users.
However, your professional information, such as your job role and professional email, may be listed on ZoomInfo. You can rest assured that ZoomInfo complies with the California Consumer Privacy Act and the General Data Protection Regulation. ZoomInfo has compiled some helpful information on how they adhere to these acts, as well as the work their Director of Data Practices does to protect your professional information.
Spekit & ZoomInfo
With Spekit, ZoomInfo training finally becomes easy. Spekit offers you tools and training to ensure your sales team has the skills, knowledge, content, and everything else they need to personalize their communication and become better sellers.
Your sales reps will get just-in-time learning, giving them bite-sized bits of training right when they need it most, right in ZoomInfo. They’ll also get short quizzes that test their knowledge and give you insight into where they need more training.
Spekit lets you align your reps with tool and process changes, ensuring a faster ramp up to them learning to use ZoomInfo most effectively. Embed FAQs and support right in the platform, giving them ZoomInfo assistance where and when they need it most.
No more interrupting your workflow to dig into massive manuals to understand how ZoomInfo works. Let Spekit surface the exact ZoomInfo training you need exactly when you need it. With Spekit, reps ramp 30% faster, can spend 69% more time selling, and have 20% higher quota attainment.
Schedule your Spekit demo today, and learn how Spekit and ZoomInfo make a perfect match.